
|
El punto revés es literalmente el revés del punto derecho. Lo que significo es cuando cambias cada “detrás” en los instrucciones de para un punto derecho a “derecho” y cada “izquierda” por “derecha” o viceversa, tendrás las instrucciones para un punto revés.
|
The purl stitch is literally just the a backwards knit stitch. What I mean is that if you take every “back” in the instructions for a knit stitch and change it to “front” and every “left” to “right” or vice versa, you will have the instructions for a purl stitch.
|
|
1. Con la ag. principal en su mano no dominante y el estambre detrás de la labor, inserte la punta de la ag. trabajadora adentro del p. principio.
|
|
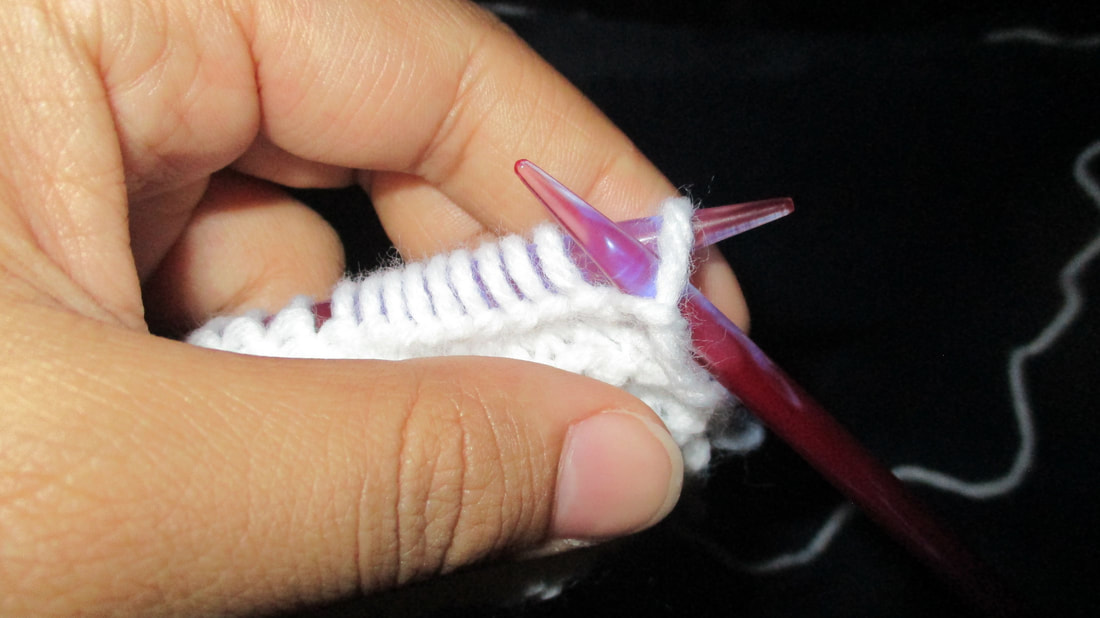
1. With the main needle in your non-dominant hand and the yarn at the front of your work, insert the tip of the working needle into the first st.
|
|
2. Traiga el estambre arriba entre de las puntas de las ag.s. Precaución: Cuide de que no está usando el término del estambre.
|

|
2. Bring the yarn up between the tips of the needles. Caution: make sure that you are not using the yarn tail.
|
|
3. Arranque el estambre por el p. Ese crea un bucle en la ag. trabajadora.
|

|
3. Pull the yarn through the st, creating a loop on the working needle.
|
|
4. Mueve la ag. trabajadora en la dirección de su mano dominante hasta que el p. caiga de la ag. principal. Ayudará retener los próximos ps de la ag. principal en su mano no dominante para prevenirles de deslizar también.
|

|
4. Move the working needle in the direction of your dominant hand until the st comes off the main needle. You may find it helpful to hold down the next st on the main needle with your non-dominant to prevent it from sliding off as well.
|
|
Repita los pasos 1-4 hasta el término de la hilera (h). Apunte: Debe tener el mismo número de ps que tuve al comienzo. Ahora es el tiempo perfecto para contarles.
Recuerde que antes de que haga la próxima hilera, necesita dar vuelta labor. |
Repeat steps 1-4 until the end of the row. Note: You should have the same number of sts that you started with.
Remember that before moving on to the next row, you must turn your work. |

